How I've created an intruder detector - Part 2
Introduction
This article is the Part 2 of the series How I've created an intruder detector. For new readers, here’s a link to the Part 1 - Get the picture where we discover how to manually retrieve the image from a D-Link DCS 932L.
Part 2 - Motion detection
Now that we’ve access to what the camera sees, we can start the motion detection work.
In order to create a simple solution, I’ve first wanted to simply detect when an image is different from the previous one and to know how much delta there is between these two images. At first, I prefer to have false positives rather than false negatives (too much pictures rather than not enough). The quality of the image provided by this camera is quite bad so I need something for creating a kind of sum representing the image, then, computing the differences must provide me the « amount » of changes between two images. Naive, but I like to first test a naive approach and then re-iterate if something more complex is needed.
After some internet lookups, I’ve found an existing Golang library providing a function of Average Hash on image and a function of Hamming Distance:
https://github.com/jteeuwen/imghash
It provides other features but I’ll import it only to use its Average implementation and its Distance one.
Code
Of course, I know this is something doable in many, many languages. There is not a lot to do here and there is no reason I’ve chosen Go except I’m efficient with it and I already knew all I needed is available in its stdlib.
Conceptually, we’ll need to do four things, which will be executed regularly:
- Get the image from the cam
- Compute the hash of this image
- Compute the distance of this hash to the previous one
- Store the image if the distance is big
Get the image and compute the hash
The first two bullets are realized in the file image.go:
// get queries the camera HTTP server to get the image.
// It provides authentication through an HTTP
// header set in the configuration.
func get() ([]byte, error) {
	req, err := http.NewRequest("GET", config.Url, nil)
	if err != nil {
		return nil, err
	}

	// Basic Authentication
	req.SetBasicAuth(config.Login, config.Password)

	var resp *http.Response
	if resp, err = http.DefaultClient.Do(req); err != nil {
		return nil, err
	}

	if resp.StatusCode != 200 {
		return nil, fmt.Errorf("status: %d", resp.StatusCode)
	}

	defer resp.Body.Close()
	return ioutil.ReadAll(resp.Body)
}
We create a GET request, putting the Authorization header into what we’ve previously found using our browser, send the query and finally if everything went well, we return the body (or an error) which would be the image seen by the camera.
// hash hashes the given bytes using the
// Average Hash method.
// Errors on unknown file format.
func hash(data []byte) (uint64, error) {
	buff := bytes.NewBuffer(data)

	img, _, err := image.Decode(buff)
	if err != nil {
		return 0, err
	}

	return imghash.Average(img), nil
}
Here we create a Golang image object (because it’s the type wanted by the imghash.Average method) and we return the hash.
Compute the distance of two pictures and store the image
The distance and the picture storage will be done in the main loop of the application, you can find it in the main.go file:
var lastHash, currHash uint64
var lastImg, currImg []byte
var err error

duration, _ := time.ParseDuration(fmt.Sprintf("%ds", config.Frequency))
ticker := time.NewTicker(duration)

// timed infinite loop
for t := range ticker.C {
// retrieve the current img and its hash
	currHash, currImg, err = current()
	if err != nil {
		fmt.Println("can't retrieve hash:", err)
	}

	// compute the distance between previous image and the current one
	dist := imghash.Distance(lastHash, currHash)
	if dist > config.Dist && lastImg != nil {
		fmt.Println(time.Now(), "detected a distance:", dist)
		if err = ioutil.WriteFile(config.Out+filename(t), currImg, 0644); err != nil {
			fmt.Println("while writing file:", err)
		}
	}

	// store for next iteration
	lastImg, lastHash = currImg, currHash
}
Golang has an elegant solution to create loop regularly executed using the time.Ticker type.
The loop starts by getting the hash and the bytes of the current image (the one currently seen by the camera):
// current snapshots the image currently seen by the cam.
// It returns the hash and the image (in the original format).
func current() (uint64, []byte, error) {
	data, err := get()
	if err != nil {
		return 0, nil, fmt.Errorf("error while hashing the image: %s", err.Error())
	}

	if h, err := hash(data); err != nil {
		return 0, nil, fmt.Errorf("error while hashing the image: %s", err.Error())
	} else {
		return h, data, err
	}
}
Then, it uses the imghash.Distance method to compute the distance between the previously seen image and the current one. If the distance is considered big, it prints a log and uses the helper method ioutil.WriteFile to write the image on disk. Finally it stores the current image and hash as last image and last hash, for the next iteration.
And… that’s it… ?
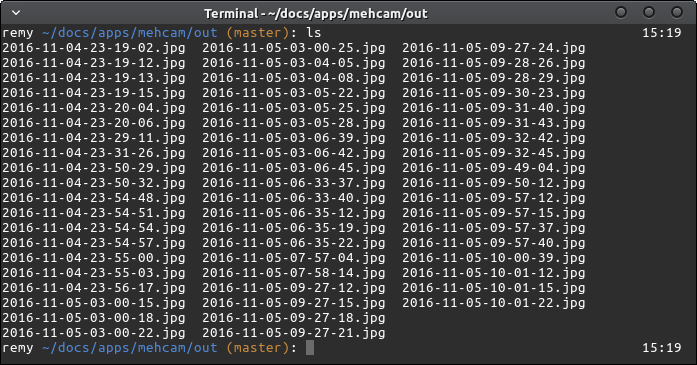
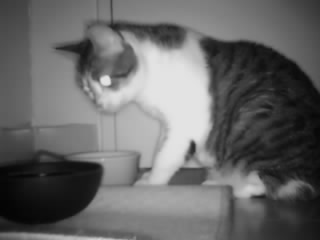
I’ve got an Intel NUC running on my local network which can access the camera HTTP server. A Raspberry is obviously a perfect match to fulfill this role. I put the camera near the cat food and I let the project run the night after having created it. This is what I found in the morning when I woke up:

I now have pictures of my cat eating at night, yay!

At this point, I have an application running on my Intel NUC which saves the pictures of the camera only when there is motion. Remember at this point that the camera is not connected to Internet because this is something I don’t want.
I’m actually surprised of the efficiency of this naive implementation of motion detection. It works really well and has close to zero false positives.
That’s the end of this Part 2 - Motion detection. The whole source code is available here: https://github.com/remeh/mehcam
In the Part 3 - Notification, we’ll see how we can modify the code to send notifications in case of motion.