Build a Linux kernel running only a Go binary
Introduction
I’ve recently thought that it’s been long since I’ve booted a Linux kernel that I’ve myself compiled. For some reasons, I also thought about the fact that it would be very easy to boot a Linux running only a Go binary, as they’re statically built if you don’t use external C or anything exotic.
This article is going through the Linux compilation process and a tiny initramfs creation to be able to boot a Go binary.
Compile Linux
Configure
First stop: https://kernel.org
At the time of writing, Linux 5.3.6 is the stable version so, let’s go for it.
$ curl https://cdn.kernel.org/pub/linux/kernel/v5.x/linux-5.3.6.tar.xz| tar Jx
$ cd linux-5.3.6
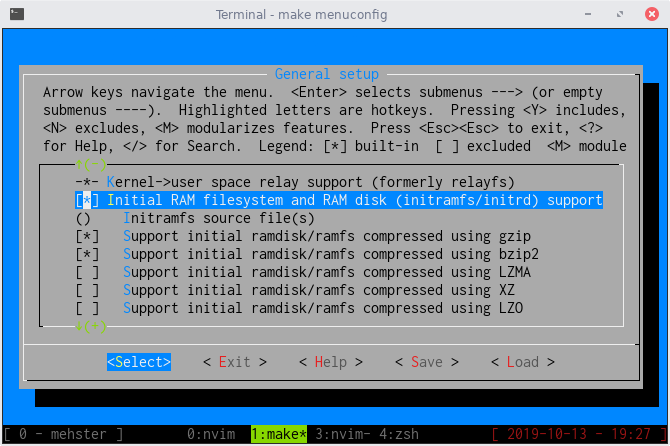
Before compiling Linux, you’ll want to configure what you actually want shipped in the kernel. Linux comes with a menu to help you configure that.
$ make menuconfig
At this point, it’s up to you. If you want to run the image on your machine without virtualization
and you’re doing this using Linux, you can use the command make localmodconfig
which configures the kernel with what’s available in the running one.
If the plan is to run it in qemu (or something else), I would advise you to remove everything that will be unused to speed up the build:
- bluetooth
- drm / intel drivers
- sound card support
- pcmcia
- even network drivers could be removed…
Build
When you are happy with your configuration, build the kernel:
$ make -j4
Use -j with the value which fits the best your CPU to indicate to make how
many jobs it can run simultaneously.
Here’s the result for my compilation configuration:
Setup is 16764 bytes (padded to 16896 bytes).
System is 6493 kB
CRC 6e1285d1
Kernel: arch/x86/boot/bzImage is ready  (#1)
Where we can see that a 6493 kB kernel has been built.
Run
In order to test the kernel you have just built, there is a convenient option
in qemu allowing you to directly boot a bzImage file:
$ qemu-system-x86_64 --enable-kvm -kernel linux-5.3.6/arch/x86/boot/bzImage
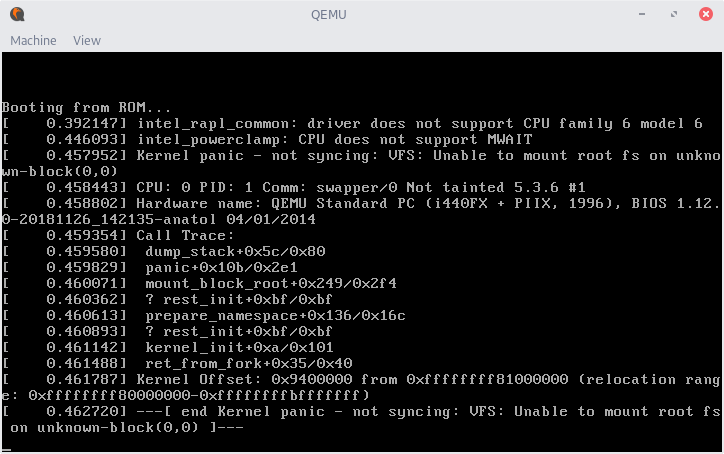
Looks like it is booting! But something is wrong: it can’t mount a rootfs, which makes total sense since we didn’t provide one.
If you prefer to run it directly in your terminal:
$ qemu-system-x86_64 --enable-kvm -kernel linux-5.3.6/arch/x86/boot/bzImage -nographic -append "console=ttyS0"
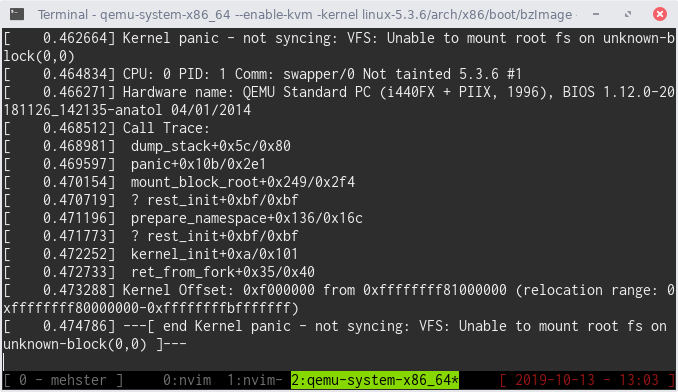
Use C-a x to exit qemu.
Use initramfs as a rootfs
Since Linux 2.6.13, the kernel is capable of booting directly on a cpio archive,
without requiring a file system or a block driver. Basically, everything will run
from the RAM and you won’t need to mount anything. All you have to do to get
started is to use the command cpio to create the archive that will be loaded in
RAM and used as the rootfs.
What you want to put inside is up to you (binaries, libraries, etc.).
Create an initramfs containing busybox
If for example you want ls, sh, cat and other useful binaries, you can
compile busybox and add these binaries into your initramfs.
Make sure to compile busybox statically though!
$ wget https://busybox.net/downloads/busybox-1.31.0.tar.bz2|tar xJ
$ cd busybox-1.31.0
$ make menuconfig # select the option to build static binaries
$ make -j4
$ make install
Now that busybox is compiled, let’s fill a directory with the content of our future initramfs:
$ mkdir -p initramfs-busybox/{bin,sbin,etc,proc,sys,usr/bin,usr/sbin}
$ cp -a busybox-1.31.0/_install/* initramfs-busybox/
What we also want is an init binary available in the root of our initramfs,
because Linux will have the good idea of starting this binary just after it has
booted!
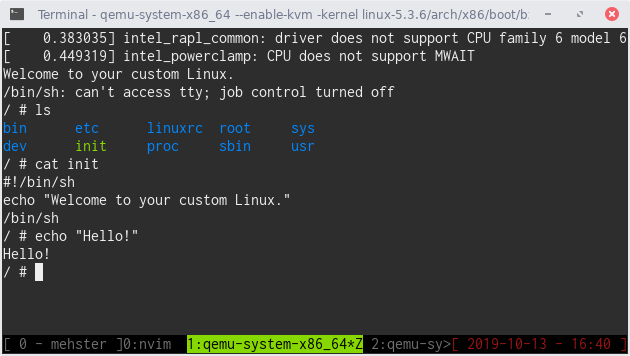
As we have sh available, we can create an executable script calling… sh to
boot on a shell interpreter.
$ echo '#!/bin/sh\necho "Welcome to your custom Linux."\n/bin/sh' > initramfs-busybox/init
$ chmod +x initramfs-busybox/init
Finally, create the initramfs archive with the content of the directory:
$ cd initramfs-busybox
$ find . -print0 | cpio --null -ov --format=newc | gzip -9 > ../initramfs.cpio.gz
$ cd ../
And voilà, initramfs.cpio.gz is our compressed initramfs! In order to boot with it:
$ qemu-system-x86_64 --enable-kvm -kernel linux-5.3.6/arch/x86/boot/bzImage \
                -nographic -append "console=ttyS0" -initrd initramfs.cpio.gz
If this doesn’t work, make sure you’ve compiled the kernel with the initramfs support.
Create a minimal initramfs with only a Go binary
Now that we know how to create an initramfs and do something useful with it, back to our initial goal: let’s boot on a Go binary.
From there, it will actually be very easy: we just have to build our binary,
make sure it is static, send it to an empty directory named as init and create
an initramfs with the content of this directory!
Let’s say we have this Go file in a directory called source:
package main
import (
"time"
"fmt"
)
func main() {
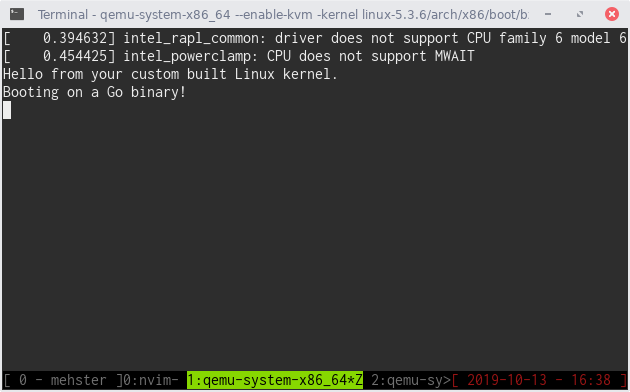
fmt.Println("Hello from your custom built Linux kernel.")
time.Sleep(time.Second*1)
fmt.Println("Booting on a Go binary!")
for {} // never stop!
}
Let’s compile it and build an initramfs with only this binary:
$ cd source
$ go build -o init
$ cd ../
$ mkdir initramfs-go
$ mv source/init initramfs-go/init
$ cd initramfs-go
$ find . -print0 | cpio --null -ov --format=newc | gzip -9 > ../initramfs.cpio.gz
And… that’s pretty much it. We can now boot on this initramfs:
$ qemu-system-x86_64 --enable-kvm -kernel linux-5.3.6/arch/x86/boot/bzImage \
                -nographic -append "console=ttyS0" -initrd initramfs.cpio.gz
Conclusion
Since the Go binaries are static, it’s very easy to boot them as the init process of a Linux kernel. We have to keep in mind that “it just works” because I’m building everything on the same CPU architecture: we would have to involve cross-compilation if we wanted to do this for another architecture.
However, starting from here, there are many things that would be very interesting to develop such as an actual init system!
If you’ve reached this point and liked this article, thank you and don’t hesitate to ping me on Twitter.
Some links I’ve used: