Bloom effect in Go
Introduction
While working on one of my side-project, I’ve had the need to render a kind of neon or glow effect on images (think the effect used everywhere in Tron). Something very close to the bloom effect used in video-games. I’ve needed to do this using software rendering (computed on the CPU), because it will run on a server without any GPU (note that it must not be confused with the bloom filter data structure).
In reality, the bloom effect is produced by the lens of cameras which can never perfectly focus, and, to cite the Wikipedia article :
Under normal circumstances, these imperfections are not noticeable, but an intensely
  bright light source will cause the imperfections [the bloom] to become visible.
How to replicate the effect
This image is composed of three rendered elements: a gray background, a red rectangle and a red circle.
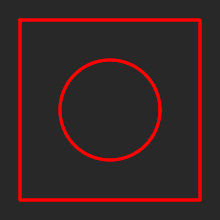
Everything looks flat and a bit boring: for a nice effect, we will want the red rectangle and the red circle to have some bloom effect. We want:
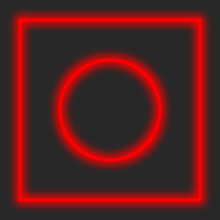
In a rendering pipeline, you control what you draw and in which order, it will then be quite easy to apply an effect only on some parts of what you’re rendering and in this case, on the red lines.
The rendering process will be:
- Create a first buffer representing the empty image
- Draw the gray background on this buffer (it doesn’t need any processing)
- Draw the red rectangle and red circle in a second buffer
- Apply the bloom effect on this second buffer
- Draw this second buffer on top of the first one
After this, the first buffer should be containing neat red lines with bloom effect
on top of a gray background. But in this rendering process, what does Apply the bloom effect mean?
Bloom effect using Go
Graphic libraries
For the rendering, I’ve used the excellent gg library. Drawing lines, rectangles and texts is straight-forward with it.
For the graphic effects, I’ve selected bild which is really easy to use and which I also recommend.
Implementation
Basically, having a camera out of focus means that the captured image is blurry, and we previously said that this is noticeable with bright sources of light.
Then, what we will want to do is to blur the red lines, because here, it is our source of light. After having blurred their lines, we draw them on top of the gray background. Let’s check out the result using the Gaussian blur shipped in the bild library:

We immediatly see that it is not really the final effect that we want: the source of light has kind of disappeared, becoming blurry but way darker.
We’ve lost our source of light? OK, let’s draw it again on top of the blurred one:
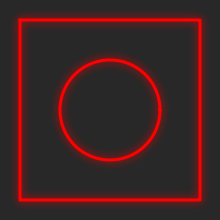
We are getting there, however, in this image I think that the effect is… too light. pun
Because we are blurring the red lines, they get transparent around their borders. Drawing the original lines on top helps but how could we increase the amount of light in the blurred one, without having this much transparency? Applying the blur a second time (or increasing its radius) won’t help, it will instead decrease the amount of light by making it sparse.
The solution is to simply use a bigger source of light before applying the blur. In order to have this improved source of light from the rectangle and the circle: we want to dilate them first. Their lines will be bigger and we will then apply a blur on a larger source of light. Hopefully, the bild library is shipping a dilate effect.
Rendering with different colors:

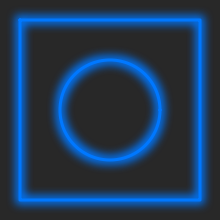
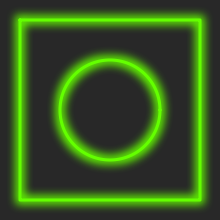
At this point, I think it is what we were looking for!
Conclusion
We’ve seen that to imitate the glow or bloom effect on an image by:
- Dilating the source of light to make it bigger
- Blurring it to make it look out of focus
- On top of this blurred light, draw the original one (which is in focus)
Please note that I’m not an expert in image processing, especially not in colors and lights theory. I hope that this article could be helpful to someone else.
Code
Here’s the full code for this article:
package main

import (
	"image"

	"github.com/anthonynsimon/bild/blur"
	"github.com/anthonynsimon/bild/effect"
	"github.com/fogleman/gg"
)

func main() {
	// draw the source of light
	// it's the buffer on which we will apply the bloom effect
	dc := gg.NewContext(200, 200)
	dc.SetLineWidth(3.0)
	dc.SetRGB255(147, 112, 219)
	dc.DrawRectangle(10, 10, 180, 180)
	dc.DrawCircle(100, 100, 50)
	dc.Stroke()

	// store the original source of light to draw it back later
	original := dc.Image()

	// bloom this source of light
	bloomed := Bloom(dc.Image())

	// now, let's do our final rendering, let's starts by rendering
	// a gray rectangle in a new buffer
	dc = gg.NewContext(220, 220)
	dc.SetRGB255(40, 40, 40)
	dc.DrawRectangle(0, 0, 220, 220)
	dc.Fill()

	// draw our bloomed light
	dc.DrawImage(bloomed, 0, 0)

	// re-apply the original source of light
	dc.DrawImage(original, 10, 10)

	// save the result in a PNG
	dc.SavePNG("output.png")
}

// Bloom applies a bloom effect on the given image.
// Because of the nature of the effect, a larger image is returned.
// 10px padding is added to each side of the image, growing it by
// 20px on X and 20px on Y.
func Bloom(img image.Image) image.Image {
	// create a larger image
	size := img.Bounds().Size()
	newSize := image.Rect(0, 0, size.X+20, size.Y+20)

	// copy the original in this larger image, slightly translated to the center
	var extended image.Image
	extended = translateImage(img, newSize, 10, 10)

	// dilate the image to have a bigger source of light
	dilated := effect.Dilate(extended, 3)

	// blur the image
	bloomed := blur.Gaussian(dilated, 10.0)

	return bloomed
}

// translateImage copies the src image applying the given offset on a new Image
// bounds is the size of the resulting image.
func translateImage(src image.Image, bounds image.Rectangle, xOffset, yOffset int) image.Image {
	rv := image.NewRGBA(bounds)
	size := src.Bounds().Size()
	for x := 0; x < size.X; x++ {
		for y := 0; y < size.Y; y++ {
			rv.Set(xOffset+x, yOffset+y, src.At(x, y))
		}
	}
	return rv
}